I got a call last Tuesday from a homeowner in the suburbs—let’s call him Mark—who’d just paid $8,000 to have his vented attic spray-foamed at the roofline. He was thrilled with the energy savings already. But then, three weeks into winter, a different contractor came out for an unrelated HVAC estimate, took one look at the attic, and told Mark he absolutely needed to buy a $2,000 dehumidifier or the foam would trap moisture and rot his roof deck. Mark called me panicked. He’d also read online that spray foam “solves moisture problems forever,” so now he didn’t know who to believe.
This conversation happens multiple times a month in my line of work. And here’s the thing: both contractors had a point. They were also both incomplete. The real answer—the building-science answer—is that do you need a dehumidifier in a sealed attic entirely depends on whether your attic is actually conditioned, what type of foam is up there, and whether anyone measured the moisture conditions before recommending a fix.
After 15 years in HVAC and home performance, I’ve diagnosed moisture problems in dozens of spray foam attics. Some needed a dehumidifier. Most needed something else first. This post walks through the honest, technical answer—the part contractors won’t always explain because it requires more work than selling you a box.
Vented vs. Sealed Attics: The Fundamental Difference That Changes Everything
Before we talk about dehumidifiers, I need to separate two completely different attic types. The confusion starts here, and it’s why you’re getting conflicting advice.
Vented Attics (The Traditional Design)
A vented attic is insulated on the floor—at the ceiling plane of the rooms below. Soffit vents and ridge vents are open to the outdoors. Airflow runs continuously from the soffits, across the attic floor, and out through the ridge. The attic is technically outside the thermal envelope of the house. It’s supposed to stay close to outdoor conditions year-round.
If you install a dehumidifier in a vented attic, you are essentially dehumidifying the outdoors. The compressor runs continuously. You never hit your setpoint. You pay the electrical bill forever. This is one of the most expensive mistakes you can make. I’ve pulled units out of vented attics that had been running for three years at a loss of nearly $1,000 per season.
If a vented attic has a moisture problem, the cause is almost never “humidity in the air.” It’s one of three specific issues: (1) a bath fan or dryer venting into the attic instead of through the roof, (2) air leaks in the ceiling plane below, allowing humid indoor air to rise into the attic, or (3) blocked soffit vents that prevent airflow. Fix the cause. Do not buy a dehumidifier.
Sealed/Unvented Attics (The Spray Foam Scenario)
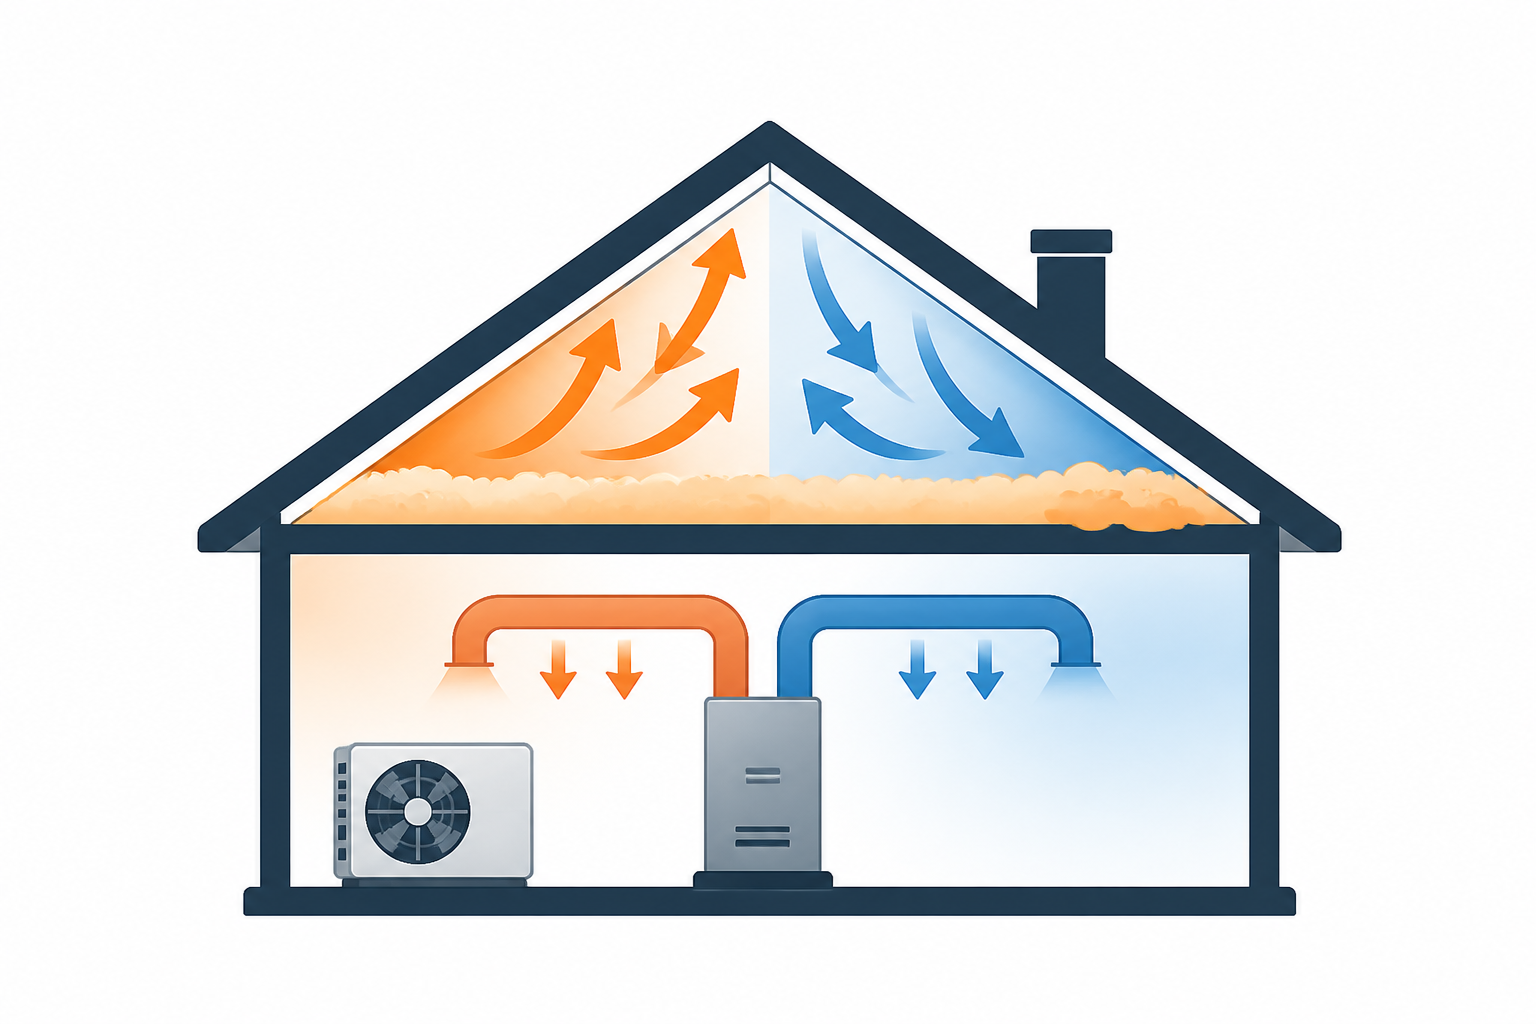
A sealed attic is created when spray foam is applied to the underside of the roof deck and the soffit/ridge vents are blocked off or never opened. The foam insulation is in direct contact with the roof sheathing. The attic is now inside the thermal envelope—it’s part of the conditioned space of the house, like a room.
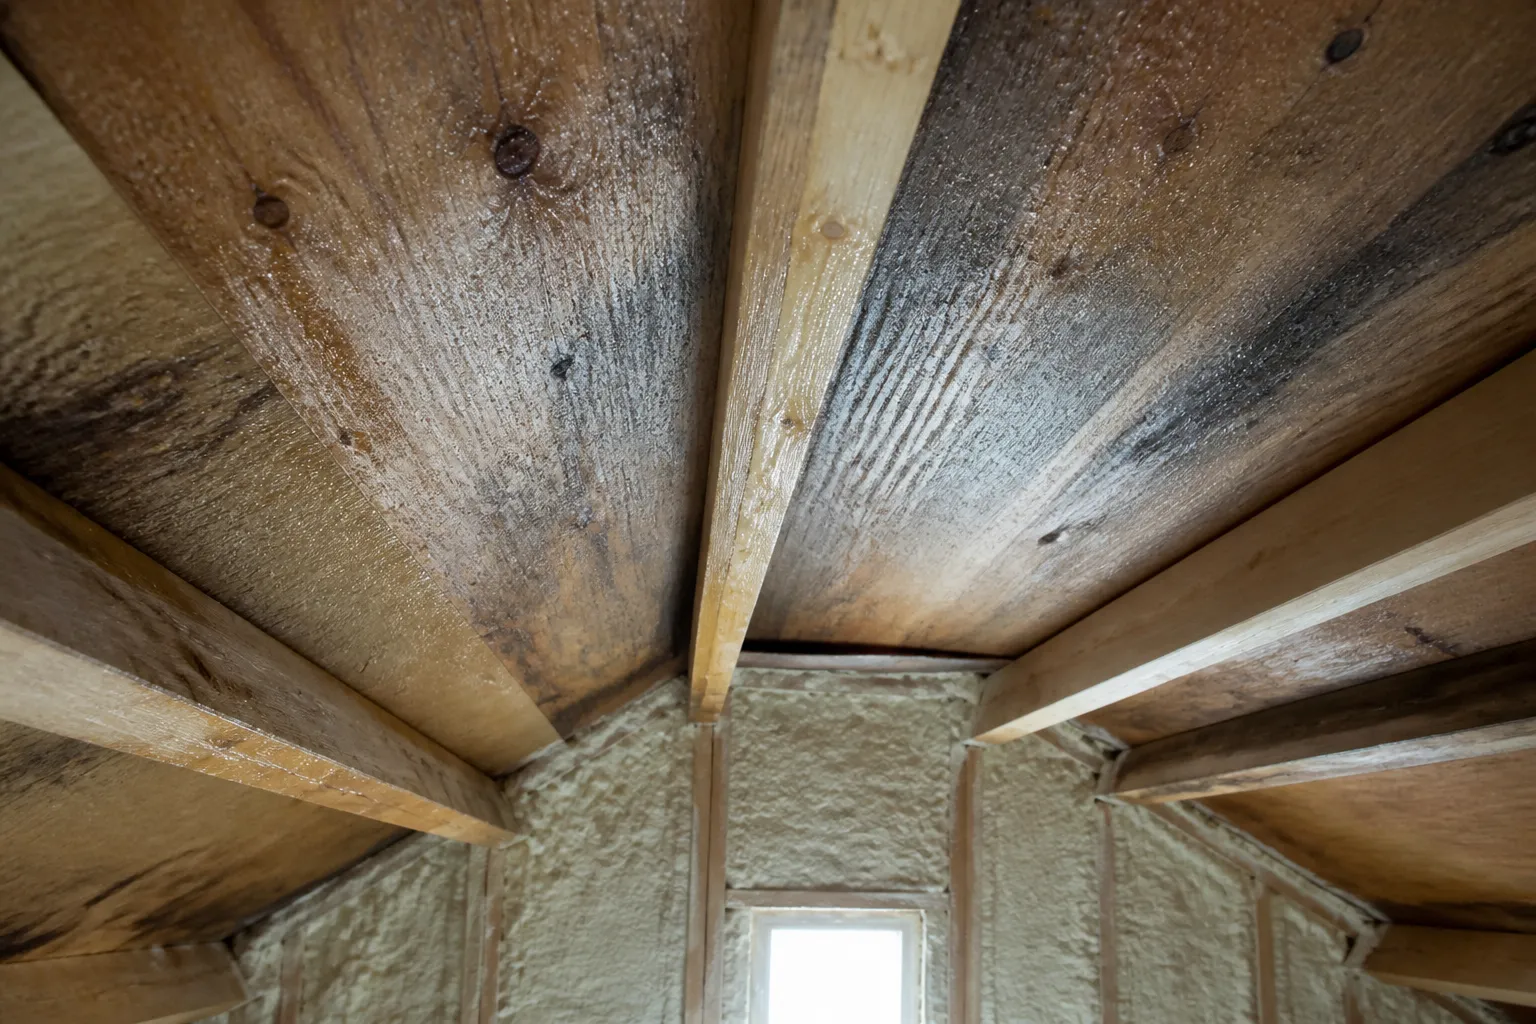
Here’s the critical part that almost nobody explains: a sealed attic has no natural ventilation path. Moisture cannot escape the way it does in a vented attic. If you add moisture to a sealed attic—from a bath fan, from air leaks in the ceiling below, or from diffusion through open-cell foam—that moisture has nowhere to go. It will condense on the cold roof sheathing in winter, raising the wood moisture content and creating conditions where mold grows.
This is where the dehumidifier question is legitimate. And this is where most contractors stop at the foam and skip the next critical step in the assembly.
Understanding the Problem: What the IRC Says (And What Most Installers Skip)
The International Residential Code permits unvented attics under Section R806.5. But permission comes with conditions. The code recognizes that a sealed attic is a new type of assembly that needs to be treated as conditioned space. The assembly must include:
- Air-impermeable insulation in direct contact with the roof sheathing, OR an approved Class II vapor retarder
- A way to control humidity in that space—either through mechanical conditioning (HVAC supply air) or a dedicated dehumidifier
Most residential spray foam jobs hit the first requirement—the foam itself—and completely miss the second. The result is an attic that looks sealed on the outside but has no path for moisture control. In winter, especially in climate zones 5 and above (anything north of the Mason-Dixon line, roughly), that’s a recipe for problems.
Open-Cell vs. Closed-Cell: Why Foam Type Matters for Humidity
Open-cell foam is vapor-permeable. It allows water vapor to diffuse through it. If your house is humid and your attic is cold (winter, night), moisture from the indoor air will travel through the open-cell foam and condense on the underside of the roof sheathing. This is especially problematic in colder climates. Most building-science guidance (I’m thinking of Joe Lstiburek’s work at Building Science Corporation, which is the standard reference) calls for a Class II vapor retarder—usually a specialized paint applied to the interior face of the foam—AND humidity control in the attic. The paint alone won’t stop all vapor migration.
Closed-cell foam, at sufficient thickness (typically 2 inches or more), acts as its own vapor retarder. It’s much more forgiving. Moisture can’t diffuse through it easily. The margin for error is wider. But���and this is the part that surprises people—closed-cell foam does not eliminate the need to condition the space. It just means you might not need to be quite as aggressive with humidity control.
Before you buy or install anything, find out what foam is in your attic. Ask the contractor who did the work. If they don’t remember (which happens more often than you’d think), it’s often visible at any cut edge or penetration. Open-cell looks like dense bread. Closed-cell looks denser, more like rigid plastic. The foam type fundamentally changes the answer to whether you need a dehumidifier.
The Numbers to Measure: Before You Spend Any Money
Here’s the most practical advice I can give you: measure your attic’s actual conditions before you buy anything. Most homeowners don’t, which is why they end up with a dehumidifier they don’t need—or don’t have one they do.
Hang a cheap digital hygrometer (you can find one at a hardware store for $15-30) in your attic. Record the reading every week for at least a full season—ideally a full year, through both summer and winter. Track these three numbers:
- Attic relative humidity: Keep it under 60% year-round. Above 60% sustained, mold gets comfortable on wood. If you see readings consistently above 70%, especially in winter, that’s a warning flag.
- Roof sheathing moisture content: Use a pin-type wood moisture meter (under $50) and press it into the underside of the OSB or plywood at several points, especially on the north-facing slope (coldest side). Under 16% is healthy. 16-19% is a watch item. Sustained readings above 20% mean OSB is starting to degrade and mold growth is likely. Check this in late winter—that’s worst case.
- Attic temperature relative to the living space below: A properly conditioned sealed attic should run within roughly 5-10 degrees of the house. If the attic is 20+ degrees off in winter, you’re not conditioning it—you’re just insulating it.
If your hygrometer reads 45-55% RH through a full winter and spring, and your sheathing moisture content stays under 18%, you probably don’t need a dehumidifier. If it’s consistently 65%+ and sheathing reads 20%+, you do.
This single step—measuring before buying—is more valuable than any contractor’s opinion, including mine. Do it first.
The Solution—What I Recommend: Order of Operations Before You Buy a Dehumidifier
If your measurements show you do need humidity control in a sealed attic, there’s a sequence. A dehumidifier is the last step, not the first. Do these in order:
Step 1: Seal the Ceiling Plane Below
Even in a sealed attic, air leaks in the ceiling below (around can lights, electrical boxes, HVAC penetrations, at the top plate) will move conditioned air upward and create moisture. A blower-door test or a visual inspection in the attic will show these. Seal them with caulk, foam, or drywall repair before you do anything else. This often solves minor moisture problems on its own.
Step 2: Verify All Exhaust Fans Terminate Outside
Every bath fan, range hood, and clothes dryer must vent through the roof or a gable wall to the outdoors. A single bathroom fan dumping into a sealed attic for just 20 minutes a day will add moisture faster than any dehumidifier can remove it. I once found a dryer venting into an attic that the previous owner had sealed with foam. The sheathing moisture content read 28%. Fix this first. Everything else follows.
Step 3: Confirm the Foam Is Continuous
Gaps, voids, or missed spots at the ridge, at the top plate, or around recessed lights create cold spots in the roof sheathing where condensation forms first. A thermal imaging camera (or a visual inspection from a ladder) will show these as cold patches. If you find them, the contractor who installed the foam should come back. Don’t proceed to humidity control until this is right.
Step 4: Provide Conditioned Air (Usually the Best Fix)
The cheapest and often most effective solution is to run a supply duct from your HVAC system into the attic and return air back to the house through a jumper duct or transfer grille. The rule of thumb is roughly 50 CFM of supply air per 1,000 square feet of attic floor area. For a 2,000 sq ft attic, that’s 100 CFM—a small supply register teed off an existing trunk duct.
This usually costs a few hundred dollars in sheet metal and minor HVAC work. It conditions the attic by bringing in dry (or less humid) air from the house, and the air circulates before returning. This solves moisture in most sealed attics. If you do this right, you won’t need a dehumidifier at all. Check your hygrometer readings again after 30 days of supply air running. Often you’ll see RH drop to acceptable levels.
Step 5: If Supply Air Is Impractical, Install a Dedicated Dehumidifier
If your attic still reads high humidity after supply air is added, or if adding ductwork is impractical (you have a mini-split house, no ductwork in the attic, or tight spatial constraints), a dedicated ducted dehumidifier is the right tool. This is where the AprilAire E070W comes in.
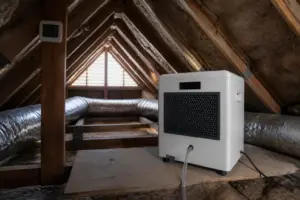
The AprilAire E070W Smart Wi-Fi Crawl Space Dehumidifier is a 70-pint-per-day ducted unit designed for low-load, low-occupancy spaces—exactly what a sealed attic is. Here’s why I specify this unit on sealed attic jobs:
- Right size for the application: For a typical 1,500-2,500 sq ft attic, a 70-pint unit is the standard range. It’s not oversized (which wastes energy and creates unnecessary dehumidification), and it’s not undersized (which means it runs constantly and never hits setpoint). A whole-house dehumidifier—90+ pints—is overkill for an attic.
- Ducted design: This is a connected unit, not a portable box you plop in a corner. You run a short supply duct and return duct within the attic so the unit actually turns the air over across the space. A ducted system achieves better humidity control than a point dehumidifier.
- Includes a pump and secondary drain pan: Condensate drain in an attic is a critical safety issue. This unit comes with a condensate pump (to handle uphill drain runs) and a secondary drain pan with a float switch that shuts the unit off if the primary drain fails. This is the detail that separates a professional install from a disaster waiting to happen.
- Smart controls: The Wi-Fi capability lets you set humidity setpoint at 50-55% RH (the right target for an attic—not 40%, which wastes energy) and monitor performance remotely. You can see if the unit is actually running, what humidity reads, and whether the pump is working.
- MERV 11 filter included: The attic air can be dusty. A decent filter means the unit doesn’t clog with dust and lose efficiency.
One honest limitation: a dehumidifier is a heat pump. It removes moisture by cooling air, then reheats it before returning it. This dumps sensible heat into the attic. In a sealed attic it’s minor—the attic might run 2-3 degrees warmer than it otherwise would—and in winter it can even help. But the electrical cost is real. Expect 400-700 watts of draw while running. At $0.15 per kilowatt-hour, that’s roughly $25-40 per month of operation if it’s running half the time during the humid season. Budget accordingly.
Step-by-Step: How to Install and Commission a Sealed Attic Dehumidifier
If you’ve done steps 1-4 above and still need a dehumidifier, here’s how to install and set it up for success:
Location and Mounting
Mount the unit in a central location in the attic where you can run supply and return ducts to achieve good air circulation. Avoid corners or tight spaces where air just recirculates around the unit itself. The hanging kit makes this straightforward. Make sure there’s clearance for the pump and drain lines. A wall or truss near the center of the attic is ideal.
Ductwork and Air Circulation
Run flexible ductwork (6-inch diameter is typical) from the return side of the unit to pull air from different areas of the attic—aim for the peak or highest point if possible. Run supply duct back out to distribute dehumidified air. The goal is to move air in a circuit, not just dehumidify the small area around the unit. This matters more than people think.
Condensate Drainage (Critical Safety Step)
The AprilAire unit comes with a pump and secondary drain pan. Use it. Route the primary condensate drain to an existing HVAC condensate line if one runs through the attic and can maintain slope. If not, the pump allows you to run the line anywhere—even uphill if needed—to an attic drain, a wall penetration, or to daylight on the home’s exterior.
Install the secondary drain pan underneath the unit with a float switch connected to the pump relay (the unit cuts power if water level in the secondary pan rises, signaling primary drain failure). An unattended condensate leak in an attic will destroy drywall, insulation, and anything stored up there. I’ve seen $8,000 water damage from a 72-hour dehumidifier drain failure. This is not optional.
Electrical and Controls
Have a licensed electrician run a dedicated 240V circuit to the unit (check the specs—most 70-pint units require 240V). The Wi-Fi controls on the AprilAire E070W mean you can set your target humidity (50-55% RH is the sweet spot) and monitor performance from your phone. Don’t chase a setpoint below 50%—there’s no benefit and it increases electrical run time.
Commissioning and Monitoring
After installation, let the unit run for 2-3 weeks and monitor humidity readings on your hygrometer. Take a sheathing moisture reading with your moisture meter a month after startup. You should see RH drop into the 45-55% range and sheathing MC stabilize below 18%. If you don’t, go back to steps 1-4—there’s likely a supply air path issue, an air leak, or an exhaust fan still dumping into the attic.
Common Mistakes People Make (And Why They Cost You)
Mistake 1: Buying a Dehumidifier for a Vented Attic
I’ve pulled three dehumidifiers out of vented attics in the last two years alone. All three had been running for 2+ years straight, never hit setpoint, and cost the homeowner $2,000+ in electricity with zero improvement. The attic stayed humid because it’s supposed to—it’s outside. The unit was fighting the climate. If your attic is vented, don’t buy a dehumidifier. Fix the cause (exhaust fans, air leaks, blocked vents) instead.
Mistake 2: Installing a Dehumidifier Before Sealing Air Leaks
If your attic is reading 70%+ humidity and you buy a dehumidifier without first sealing the ceiling plane, you’re putting a Band-Aid on a broken bone. The air leaks are feeding moisture in faster than the dehumidifier can remove it. The unit will run 16+ hours a day and never quite reach setpoint. Fix the leaks first. The dehumidifier should be the finishing touch, not the primary fix.
Mistake 3: Neglecting Drainage or Using a Gravity Drain on an Uphill Run
Gravity drains work only if the drain line can slope continuously downward from the unit to the termination point. In an attic, that’s rarely possible. The pump is included in the AprilAire E070W for a reason. Use it. And do not skip the secondary drain pan and float switch. An attic dehumidifier drain failure is one of the most expensive water damage scenarios I’ve seen.
Mistake 4: Setting the Humidity Setpoint Too Low
I’ve seen homeowners set their attic dehumidifier to 30-35% RH because they think “lower is safer.” It’s not. Wood in a home stays healthy at 30-60% RH. Pushing it below 35% in a sealed attic wastes electrical energy and can actually cause wood shrinkage and nail pop issues. Set it to 50-55% and leave it there. That’s the right target.
Mistake 5: Installing a Portable Dehumidifier Instead of a Ducted Unit
A portable dehumidifier sitting in a corner of your attic will dehumidify the air immediately around it but won’t effectively condition the whole space. A ducted unit like the AprilAire circulates air through supply and return ducts, achieving consistent humidity control across the entire attic. The portables are cheaper upfront but much less effective in practice.
When to Call a Pro vs. What You Can DIY
Call a pro for: Sealing air leaks in the ceiling plane (needs attic access, safety equipment, and attention to detail). Running electrical to the dehumidifier (needs a licensed electrician for safety and code compliance). Venting exhaust fans through the roof (requires flashing, roof penetration, and proper termination). Installing ductwork and running condensate drain lines (this is where details matter most—get it wrong and you’re looking at a moldy attic or water damage). Measuring roof sheathing moisture content if you don’t own a moisture meter (a professional pin meter costs more but is more accurate than the budget units).
You can DIY: Hanging a hygrometer and recording readings (this is actually your most valuable diagnostic step—do it). Checking that bath fans and dryer terminate outside (visual inspection from your attic or outside). Verifying that soffit vents aren’t blocked (walk around outside and look). Installing the dehumidifier itself if you’re comfortable with electrical (the hanging kit makes it straightforward). Setting the humidity setpoint and monitoring performance through the app.
The Bottom Line: Do You Actually Need a Dehumidifier in Your Sealed Attic?
The answer is: measure first, then decide.
If your spray foam attic is vented, don’t buy one. If it’s sealed and unvented, follow the order of operations I laid out: seal leaks, verify exhaust fans, confirm foam continuity, provide supply air. Most of the time, that solves the problem.
If you’ve done all of that and your hygrometer still reads 60%+ in winter or your sheathing moisture climbs above 20%, then yes—you need humidity control. The AprilAire E070W is the unit I specify for sealed attics because it’s sized right, it’s ducted (not a portable point unit), it includes a condensate pump and secondary drain safety, and the Wi-Fi controls let you monitor performance without climbing into the attic every week.
But don’t buy anything until you’ve hung a hygrometer, recorded real numbers, and confirmed you have an actual moisture problem. Most dehumidifiers end up in basements or crawl spaces where they belong, not in attics where they’re fighting against poor ductwork design or a single unsealed exhaust fan.
Start with measurement. Everything else follows from there.
— Dana
About This Article

Written by Dana Sorensen. Homeowner turned building-science obsessive. I help other homeowners understand attic insulation, ventilation, and air quality so they can stay comfortable year-round without overspending on energy bills. More about this site.
Scope and limits. Dana is a homeowner who studies building science, not an HVAC contractor or licensed tradesperson. Anything involving combustion appliances, gas lines, or electrical work belongs with a licensed contractor.
Verify this against a primary source
Specifics change, and your situation may differ from the one described here. These are the authorities worth checking directly:
- ENERGY STAR — recommended insulation R-values by climate zone
- U.S. Department of Energy — air sealing and insulation guidance
- EPA Indoor Air Quality — ventilation and indoor air quality standards