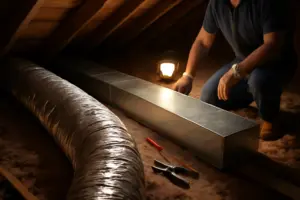
Last month I was called out to a residential attic to commission a new ductwork run, and I found the homeowner had already gotten halfway through sealing the joints themselves. They’d bought a roll of silver tape and a tub of gray paste from the big-box store, and they were standing there in the aisle confusion trying to figure out which one to use. “Is the tape for finishing,” they asked, “and the paste for priming? Like drywall?”
I see this exact moment play out maybe twice a month. The homeowner is working from drywall vocabulary—tape, compound, finish—and HVAC terminology has completely different names for these products. What they’re calling “paste” is actually duct mastic. What they think is “finishing tape” could be one of two completely different things. And the roll they almost grabbed? Generic cloth-backed duct tape. It’ll fail in two years.
The confusion is so common and so predictable that I’ve started keeping a quick translation handy on service calls. Today I’m giving you that translation, plus the real reason you need both products—and when to use each one on round metal duct.
Understanding the Problem: The Round Duct Finishing Tape vs Paste Confusion
Here’s where the confusion starts: you walk into the HVAC aisle looking for ways to seal round duct joints, and the language is not what you expected. Let me translate.
The “Paste” Is Duct Mastic
That gray or off-white tub you see is duct mastic—a thick, water-based sealant brushed or gloved onto duct seams. It’s sold in gallon tubs and also in caulk tubes for small repairs. When you buy it, look for a label that says UL 181A-M or UL 181B-M. That’s the HVAC rating. Without it, you’re buying a product that won’t meet code and won’t hold up to pressure testing. Mastic doesn’t cure instantly; it typically needs 24 to 48 hours before you can safely pressure test the system. It’s water-based, so cleanup is easy while wet, but once cured you’re chiseling it off.
The “Finishing Tape” Could Mean Two Completely Different Products
This is where almost every DIY guide fails the reader, because they use “tape” without being specific. There are actually two tapes in the HVAC world, and they do completely different jobs.
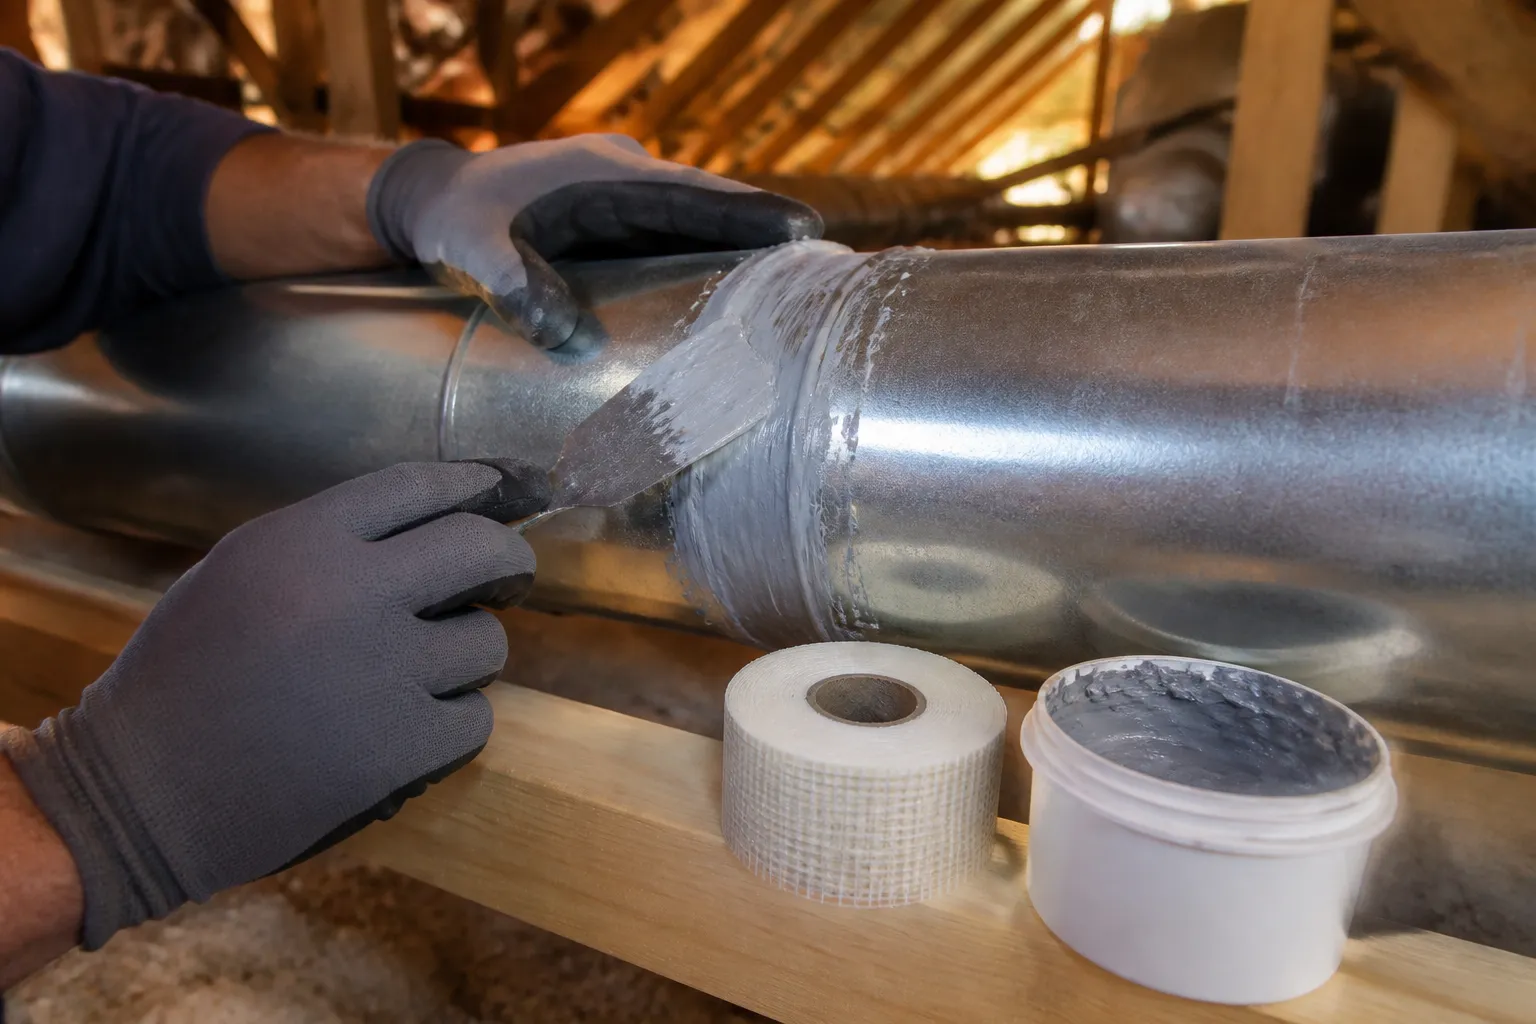
- Fiberglass Mesh Tape: This is an open-weave tape—think of it as looking exactly like the white mesh drywall tape you’ve probably used. It is not a sealant on its own. It has no adhesive. Its only job is reinforcement. You embed it into wet mastic, the same way you’d embed drywall mesh into joint compound. It bridges larger gaps (wider than about 1/4 inch) and gives the mastic something to adhere to. Without mastic underneath and on top of it, fiberglass mesh tape does nothing.
- UL 181-Listed Foil Tape: This is an aluminum foil tape with a pressure-sensitive adhesive that is rated specifically for HVAC ductwork. It IS a standalone seal—you can use it without mastic. Look for the actual printing “UL 181A-P” (for rigid duct) or “UL 181B-FX” (for flex duct) printed directly on the tape itself. If those words are not there, it is not the right tape, no matter how much it looks like it. If it just says “heavy-duty” or “all-purpose” duct tape with no UL rating, walk away.
- The One You Should Never Buy: Cloth-Backed “Duct Tape” The silvery tape with a cloth backing that’s been called “duct tape” since forever? It is not for sealing HVAC ducts. The adhesive dries out and loses grip within a couple of seasons. The name is a historical accident—it was originally called “duck tape” because of the cotton duck cloth, and homeowners never actually used it on ducts. Yet it’s still the first thing homeowners grab. Don’t.
Why Round Duct Changes the Equation
Here’s the part that almost nobody writes about, and it’s the reason round duct sealing deserves different advice than rectangular trunk lines. Round duct has no corners. A roll of foil tape can be applied in one continuous wrap around a smooth cylinder with no folding, no bridging, and no gaps at the corners. That makes UL-listed foil tape considerably more viable on round duct than it ever is on rectangular trunk lines, where the corners are exactly where tape fails first.
So on round duct, tape is a legitimate option—with conditions I’ll explain below. On rectangular trunk, I almost always recommend mastic.
According to EPA data, typical homes lose 20 to 30 percent of their conditioned air to duct leakage. Most of that loss happens at seams, joints, and takeoffs—the exact places you’re about to seal. Getting this right is one of the highest-return DIY projects available to a homeowner, and it’s entirely within reach if you understand which tool to use where.
The Solution: What I Recommend for Round Duct Sealing
For most homeowners sealing accessible round duct joints in an attic or basement, I recommend a two-product approach: a quality UL-rated duct mastic paired with fiberglass mesh tape. The mastic does the sealing work, the mesh tape reinforces it, and together they handle 95 percent of the joints you’ll encounter on a round duct system.
The product I reach for is Red Devil 0841DX F-Seal 181 Duct Seal, Fiber Reinforced Water Based Duct Sealant, 1 Gallon, Gray, Made in USA. At around $26.87, a single gallon seals well over 100 linear feet of seams if you apply it correctly, which makes it roughly 25 cents per foot of sealed duct.
Why This Product Works:
- UL 181A-M Rated: It carries the proper HVAC certification, which means it’s tested for air leakage, adhesion, and durability. It will pass code inspection and pressure testing. That’s not a luxury—it’s the baseline.
- Water-Based and Low-VOC: It doesn’t off-gas in your attic, it cleans up with water while wet, and it works safely in occupied homes. A brush or gloved finger goes on easy, and there’s no solvent smell lingering in the space.
- Fiber-Reinforced Formula: The mastic already contains short fibers mixed into it, which gives you some of the benefit of embedded mesh tape even if you don’t use separate mesh. For small gaps (under 1/8 inch) you can use mastic alone. For larger gaps, you’d still embed a separate fiberglass mesh tape into the wet mastic, then apply a second coat of this same product over it.
- 20-30 Year Lifespan in Protected Spaces: Once cured, this mastic doesn’t shrink significantly or crack, and it stays flexible enough to handle the small vibrations and temperature swings of a duct system. In an attic or crawl space where it won’t see direct UV or mechanical abuse, it’ll still be sealing when you sell the house.
- One Honest Limitation: It requires 24 to 48 hours of cure time before the system can be pressure tested, and it won’t cure properly below 40°F. If you’re sealing duct in a cold attic in January and need immediate results, foil tape is faster. But for most seasonal work and for jobs that can wait overnight, this is the more forgiving choice.
You’ll also want a roll of fiberglass mesh tape (any brand rated for ducts) to pair with it. Most hardware stores carry it near the drywall supplies for under $10. Together, mastic plus mesh tape give you the redundancy and durability that professionals rely on.
The Joints You’re Actually Sealing: Where Each Method Works Best
Before you start applying anything, you need to know what you’re sealing. Round duct systems have several different joint types, and each one has a preference.
Crimped Slip Joints (Round-to-Round Connections)
This is the standard connection between two lengths of round duct: one end has a male crimp (slightly smaller diameter) that slides into the female end of the next section. Here’s the pro sequence:
- Install a minimum of three sheet metal screws evenly spaced around the joint—mechanical fastening first, sealant second, always. Screws are your insurance against vibration and pressure.
- Seal the seam with either mastic (brush or glove it on 1/8 inch thick, 2 inches onto the metal on each side) or a full wrap of UL 181A-P foil tape applied with a seam roller.
- On round duct, a single continuous wrap of foil tape is actually effective here because there are no corners. Tape alone is a legitimate choice for clean, dry metal above 40°F.
Longitudinal Seams on Spiral or Snap-Lock Pipe
Some round duct (especially spiral pipe and snap-lock pipe) has a seam running the entire length of each section. That seam will leak if you don’t seal it. Most people seal the crimped joints and completely ignore the longitudinal seam—a missed opportunity. Run a bead of mastic down the seam or wrap a strip of foil tape along it. It takes five minutes and cuts leakage from that duct in half.
Takeoff Collars at the Trunk
This is where a round branch duct leaves a rectangular plenum or main trunk. It’s typically the single leakiest connection in a residential duct system, and it has irregular geometry: a round collar flange pressing against flat sheet metal with gaps on all sides. Tape cannot conform to that transition reliably. Use mastic. Brush or glove it on generously around the entire collar perimeter, working it into the gap. This is a place where mastic’s forgiving nature is an actual advantage.
Boot and Register Connections
Where round branch ducts connect to wall boots and floor registers, mastic is your best choice. The connection is often at an angle, the surface may not be perfectly clean, and you need a seal that will stay flexible. See the detailed boot sealing article for step-by-step here on the blog.
Insulated (Wrapped) Round Duct
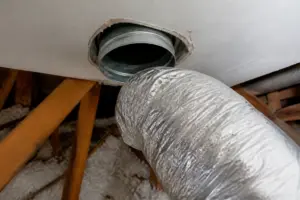
If you’re sealing round duct that’s already wrapped with insulation and an outer vapor jacket, you must seal the inner metal core first, then pull back the insulation and outer jacket and seal the jacket separately. Sealing only the outer jacket is a very common and completely ineffective mistake—the air is still leaking from the metal core underneath. Do the hard part first.
Step-by-Step Application: How to Seal Round Duct Properly
Using Duct Mastic (Red Devil 0841DX or Similar)
Preparation: Stir the mastic thoroughly—it settles. Wear nitrile gloves; a gloved finger is a better applicator than a brush on round pipe. The curved surface of a brush tends to leave drips and miss the full seam width.
Application:
- Lay the mastic on about 1/8 inch thick—roughly the thickness of a nickel. Thicker is not better; it just wastes material and takes longer to cure.
- Carry the mastic 2 inches onto the metal on each side of the joint. Don’t skimp here; inadequate coverage is the most common reason for leaks.
- The joint should not be translucent anywhere when you’re done—if light passes through it, you’re too thin.
- If you’re adding fiberglass mesh tape (for gaps wider than 1/4 inch), press it into the wet mastic now, then apply a second coat of mastic over it. This is exactly how drywall taping works, and it’s exactly how pros reinforce large gaps.
- Cure time is typically 24 to 48 hours before pressure testing. Longer in cold or humid conditions. It will not cure properly below 40°F.
- Clean up with water while it’s wet. Once cured, you’re chiseling.
Using UL 181A-P Foil Tape
Preparation: Wipe the metal with a clean, dry rag first. Adhesion is everything, and dust or moisture will kill it. Do not proceed if the metal is damp or visibly dirty.
Application:
- Cut a length of tape that overlaps itself by 2 inches on the wrap around the duct. On a 7-inch duct, that’s roughly 24 inches of tape.
- Apply without stretching. Stretching reduces the adhesive contact and causes the tape to relax later, opening gaps.
- Work it down hard with a plastic squeegee or seam roller. Pressure-sensitive adhesive only bonds under pressure. Skipping the roller is the #1 reason tape jobs fail.
- Press the tape into the screw heads so it conforms rather than tents over them. Wrinkles and bubbles are points of failure.
- Tape is ready to pressure test immediately. No cure time.
Pro Tip: For round-to-round slip joints, I often use both. A bead of mastic first, then the tape over it. The mastic fills any microscopic gaps and gives the tape something to bite into. It’s belt-and-suspenders, and it works.
Common Mistakes to Avoid When Sealing Round Duct Joints
1. Forgetting to Install Screws First
A sealed joint without mechanical fasteners is relying entirely on the sealant to hold the duct together under pressure and vibration. After a few years, that fails. Install three sheet metal screws evenly spaced around the joint before you seal it. Sealant is your second line of defense, not your first.
2. Using Regular Duct Tape Instead of UL-Listed Foil Tape
That silvery cloth-backed tape sitting right next to the UL-listed foil tape is not the same thing. Its adhesive is not rated for ductwork, and it dries out. I pull it off failed duct systems constantly, and it’s always already separated from the metal underneath. If you’re going to use tape, spend the extra $5 and buy the one with a UL rating printed on it.
3. Applying Mastic Too Thin
Thin mastic cures with micro-cracks that let air through. It should be opaque and roughly 1/8 inch thick. If you can see the metal through it anywhere, keep going.
4. Skipping the Seam Roller on Foil Tape
Pressure-sensitive adhesive requires pressure to bond. Tape that you press down by hand and leave wrinkly will peel back within months. A $3 seam roller from any hardware store is not optional—it’s the tool that makes tape work.
5. Sealing Only the Outer Jacket on Insulated Duct
The air is leaking from the metal core. Sealing the vapor jacket only is wasted effort. Pull it back, seal the metal first, then seal the jacket. Two jobs, one right answer.
6. Applying Mastic Below 40°F
Water-based mastic won’t cure properly in cold conditions. If you’re sealing duct in an unheated attic in winter, either use foil tape or wait for warmer weather. Applying mastic and hoping it cures is a waste of time.
Cost, Time, and Payoff: Mastic vs Tape at a Glance
Here’s how the two approaches stack up in real-world terms:
Duct Mastic (Red Devil 0841DX or Similar): A gallon runs roughly $20–30 and seals well over 100 linear feet of seams. Labor is slower per joint (roughly 2–3 minutes per crimped slip joint) because of drying time and the need to work carefully to avoid drips. It’s messier—you’ll need gloves and rags. But it’s forgiving of dusty surface conditions and handles irregular gaps gracefully. A whole-house attic duct sealing might take a full weekend including cure time before pressure testing.
UL 181 Foil Tape: A 50-yard roll runs roughly $15–25 and seals roughly 150 linear feet depending on duct diameter. Labor is faster per joint (roughly 1–2 minutes per joint) and it requires no cure time. It’s clean and requires no cleanup. But it’s completely unforgiving of dust, moisture, cold, or poor metal preparation. For a whole-house attic job, the labor savings from tape evaporate the first time you encounter a dusty seam you have to stop and wipe down, or a joint that’s slightly damp, or a screw head that catches and punctures the tape.
For Most Homeowners: Start with Red Devil 0841DX F-Seal 181 Duct Seal. One gallon handles most residential round duct systems. If you encounter gaps larger than 1/4 inch, pick up a roll of fiberglass mesh tape and embed it. The total material cost is under $50, and a careful homeowner can seal an entire attic system in one weekend.
When to Call a Pro vs DIY: An Honest Assessment
Sealing round duct is entirely doable as a DIY project if the duct is accessible and the joints are clean. You don’t need special training or tools beyond a screwdriver, nitrile gloves, and either a brush or a seam roller.
Call a professional if:
- The duct is buried in insulation or in a joist cavity and not easily accessed.
- You need pressure testing done immediately and can’t wait for mastic to cure.
- You’re sealing a very large system (over 500 linear feet of duct) and want it done in a day.
- The ductwork is in a crawl space or attic you’re uncomfortable entering.
- You need post-sealing blower door or duct leakage testing to verify the work.
For accessible attic duct in a typical two-story home, a weekend DIY project with Red Devil mastic will save you $500–$1000 in service labor and get results as good as any contractor’s.
One Safety and Code Note
Never seal over or near a combustion appliance flue or B-vent with mastic or tape. Those require metal flashing and specified clearances—don’t improvise. And don’t seal a duct system shut and then discover you’ve blocked a required combustion air path in an attic or crawl space. Safety first, always.
Next Steps: Starting Your Round Duct Sealing Project
If you’re standing in that HVAC aisle right now trying to choose between round duct finishing tape vs paste, here’s what I’d recommend: buy the Red Devil 0841DX F-Seal 181 Duct Seal (roughly $27 for a gallon) and a roll of fiberglass mesh tape. One gallon of quality mastic seals over 100 feet of seams. On most round duct systems, that’s your whole job. It’ll cure overnight, it’ll pass pressure testing, and it’ll still be sealing 20 years from now.
Start with the accessible seams in your attic or basement. Seal the slip joints between duct sections, run a bead down any longitudinal seams, and give special attention to the takeoff collars at the trunk—those are where most of your leakage is hiding. If the metal is dirty, wipe it down. Install screws first, seal second. Let it cure overnight before you pressure test.
EPA data says you’re recovering 20–30 percent of your conditioned air with this work. On a typical home in a moderate climate, that translates to $200–$400 per year in heating and cooling savings. A $30 can of mastic pays for itself in the first season. That’s a weekend well spent.
Questions? I’m here to help. Reach out in the comments below, or if you need personalized ductwork diagnostics, schedule a service call.
About This Article

Written by Dana Sorensen. Homeowner turned building-science obsessive. I help other homeowners understand attic insulation, ventilation, and air quality so they can stay comfortable year-round without overspending on energy bills. More about this site.
Scope and limits. Dana is a homeowner who studies building science, not an HVAC contractor or licensed tradesperson. Anything involving combustion appliances, gas lines, or electrical work belongs with a licensed contractor.
Verify this against a primary source
Specifics change, and your situation may differ from the one described here. These are the authorities worth checking directly:
- ENERGY STAR — recommended insulation R-values by climate zone
- U.S. Department of Energy — air sealing and insulation guidance
- EPA Indoor Air Quality — ventilation and indoor air quality standards